| | T/A Hood Venting System- Challenger Install w/ Pic's |  |
|
|
| Author | Message |
|---|
Hurst Pak
CAMM Pro

Location : Crown Point In
Points : 6192
Posts : 393
Reputation : 137
 |  Subject: T/A Hood Venting System- Challenger Install w/ Pic's Subject: T/A Hood Venting System- Challenger Install w/ Pic's  February 25th 2011, 8:14 pm February 25th 2011, 8:14 pm | |
| Well I started the install Figured I would post step by step as a "How to " Sorry did not think of pics till after I started Tools :Trim pulling tool, 1/4 " 10mm socket with ext & ratchet, Drill with a large bit (large enough for a Jig saw blade. Jig saw with a metal cutting blade ( fast cut ), some type of cover for motor . wood block. 2" tape, urithane caulk. straight edge.marker.saftey glasses.Clear packing tape. clamps. 1. Open hood  2. cover motor & fenders to protect form metal shavings nics ect... 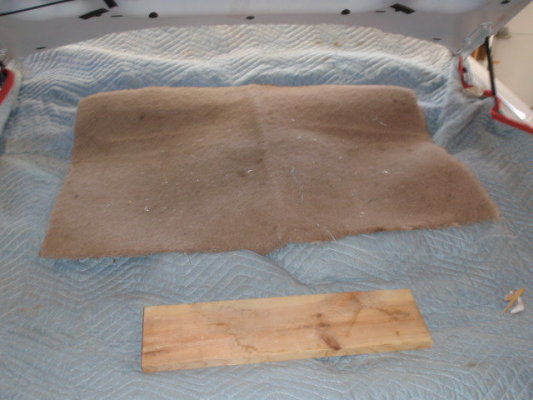 3. remove sound insulator but using trim tool to remove fasteners. 4. remove hood scoop. 5-10mm nuts three at back , two either side center. lift off from back first as front has hooks. 5. from underside, drill holes in the corners where hood reinforcement opens to hood outter panel 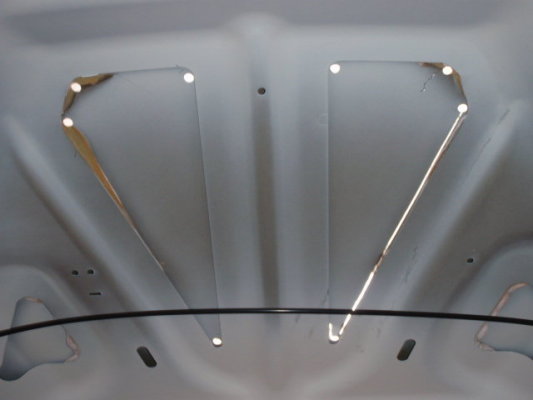 6. From top side connect the holes with straight edge & marker.  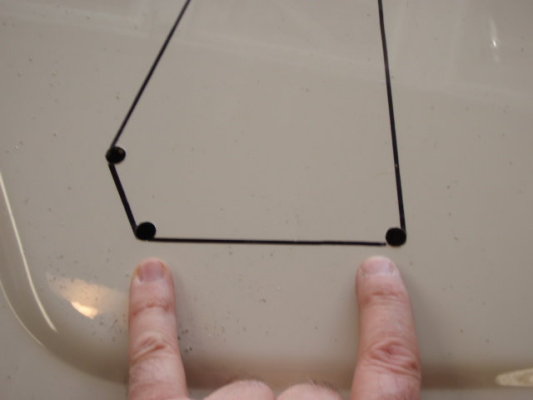 7. drop hood down, with a wood block to prop hood up, to give Jig saw blade room to move with out doing damage to engine cover.  8. safely install blade into Jig saw & then plug in. put on safley glasses  ****NOTE >>> be aware of windshield washer line. Tape back out of way <<<  ******>>> Use of clear packing tape over cut lines will keep cut section of hood from flopping around<<  9. cut the hood section out using you marks as guide. try to get close to the reinforcement edge as possible with out cutting it. Be careful ,Take your time !!!  10. Once the first hole is completed . may want to use clamps to hold hood panel from vibrating as center was not secured to reinforcement ( on mine at least)  11. clean cut edges of burs and sharp edges. clean up as needed 12. Caulk the gap between the hood outter panel & reinforcement. to prevent dirt & water from getting in between panels. **Un caulked  **Caulked  13. touch up edge after caulk has cured.*optional as will not be seen ****************Hole cutting completed****************  Venting unit install to follow .. stay tuned .. Same Camm fourm ,same Camm time. | |
|
  | |
VIKES4093
CAMM Pro

Location : bartlett, il
Points : 6596
Posts : 711
Reputation : 133
 |  Subject: Re: T/A Hood Venting System- Challenger Install w/ Pic's Subject: Re: T/A Hood Venting System- Challenger Install w/ Pic's  February 25th 2011, 10:33 pm February 25th 2011, 10:33 pm | |
| wow you got alot of guts to do that.i would be to nervous  | |
|
  | |
Hurst Pak
CAMM Pro

Location : Crown Point In
Points : 6192
Posts : 393
Reputation : 137
 |  Subject: Re: T/A Hood Venting System- Challenger Install w/ Pic's Subject: Re: T/A Hood Venting System- Challenger Install w/ Pic's  February 26th 2011, 9:15 pm February 26th 2011, 9:15 pm | |
| Worked on finishing the install . Test fit & tape in place.   Drill for plactic rivets using 1/4 inch bit. I started from the top center and worked my way down & around , left to right Drilll the hole & install plastic rivets. taped in with hammer. *** Sorry no pic's of that only two hands. **** completed venting install. TOP looking down on hood. 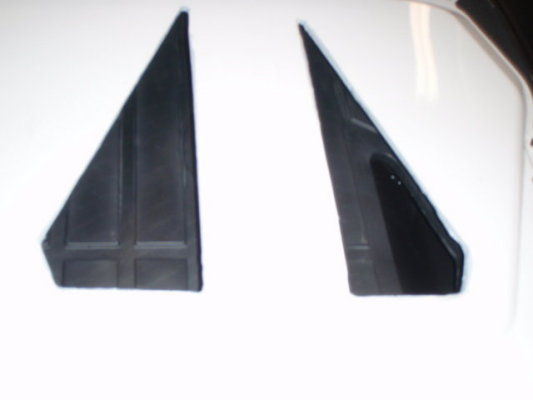 underside.  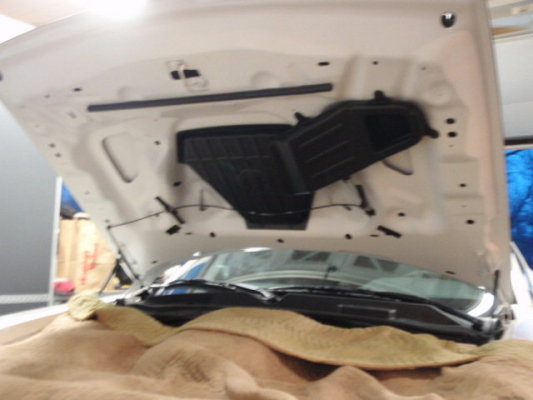 ***Modification to T/A scoop grille mounting **** Why not get all the air you can. **T/A Scoop Modifications. Remove blank grilles . 3 philips head screws each. 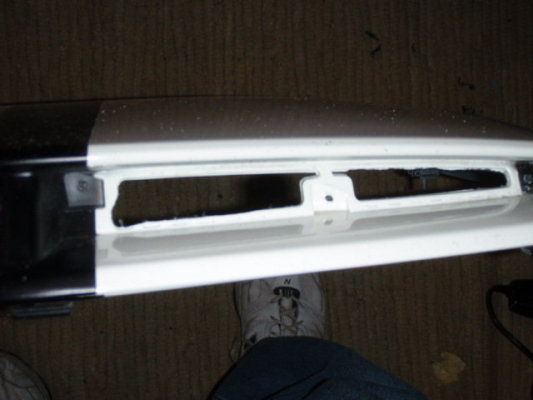  Install Venting kit supplied open grilles.  Used this rotory tool , trim up the edges of the grille openings . 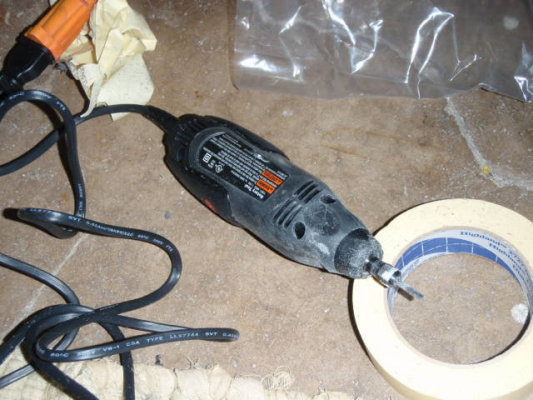 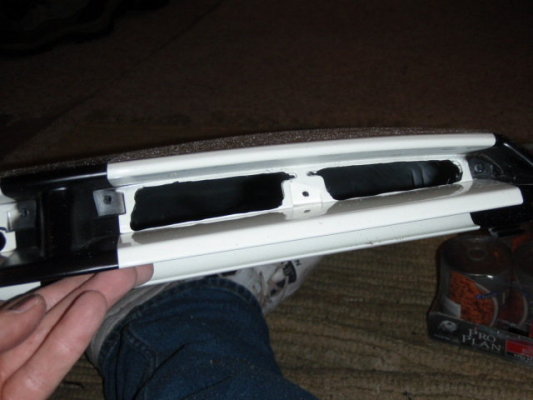  **Test fit grilles 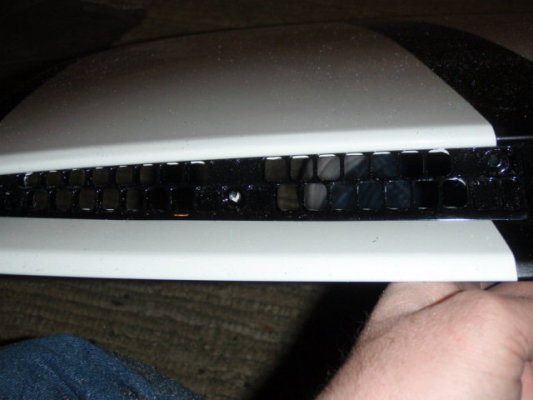 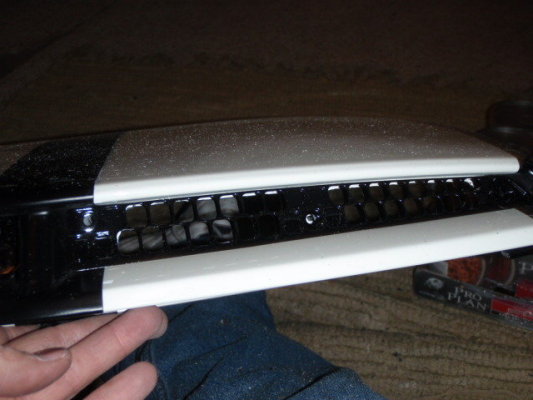 **Reinstall Grilles 3 screws each side ( reuse the orignals) *****************Must have a CAI system to operate *****************************************************  | |
|
  | |
ghost
Founding Member


Location : 60538
Points : 20107
Posts : 2314
Reputation : 451
 |  Subject: Re: T/A Hood Venting System- Challenger Install w/ Pic's Subject: Re: T/A Hood Venting System- Challenger Install w/ Pic's  February 26th 2011, 9:29 pm February 26th 2011, 9:29 pm | |
| | |
|
  | |
Headtripp
Founding Member


Location : McHenry
Points : 19534
Posts : 2605
Reputation : 655
 |  Subject: Re: T/A Hood Venting System- Challenger Install w/ Pic's Subject: Re: T/A Hood Venting System- Challenger Install w/ Pic's  February 26th 2011, 9:37 pm February 26th 2011, 9:37 pm | |
| Nice work if I get one your doing mine  | |
|
  | |
Shawn1112
Founding Member


Location : Hater Proof
Points : 34133
Posts : 12919
Reputation : 1607
 |  Subject: Re: T/A Hood Venting System- Challenger Install w/ Pic's Subject: Re: T/A Hood Venting System- Challenger Install w/ Pic's  February 26th 2011, 10:15 pm February 26th 2011, 10:15 pm | |
| | |
|
  | |
Hurst Pak
CAMM Pro

Location : Crown Point In
Points : 6192
Posts : 393
Reputation : 137
 |  Subject: Re: T/A Hood Venting System- Challenger Install w/ Pic's Subject: Re: T/A Hood Venting System- Challenger Install w/ Pic's  February 26th 2011, 10:54 pm February 26th 2011, 10:54 pm | |
| - Headtripp wrote:
- Nice work if I get one your doing mine
 Be more than happy to. You get the drinks & food. | |
|
  | |
Shawn1112
Founding Member


Location : Hater Proof
Points : 34133
Posts : 12919
Reputation : 1607
 |  Subject: Re: T/A Hood Venting System- Challenger Install w/ Pic's Subject: Re: T/A Hood Venting System- Challenger Install w/ Pic's  February 26th 2011, 11:21 pm February 26th 2011, 11:21 pm | |
| - Hurst Pak wrote:
- Headtripp wrote:
- Nice work if I get one your doing mine

Be more than happy to. You get the drinks & food. You know what, thats what the fuck its all about! People that share the same passion helping others that share the same passion out. You have all these fucking morons who are in it for them selves and could care less about helping someone out. I cant stand those fucking assholes!!!! | |
|
  | |
xegitalian19xx
Founding Member


Location : Chicago
Points : 17981
Posts : 1475
Reputation : 294
 |  Subject: Re: T/A Hood Venting System- Challenger Install w/ Pic's Subject: Re: T/A Hood Venting System- Challenger Install w/ Pic's  February 26th 2011, 11:29 pm February 26th 2011, 11:29 pm | |
| | |
|
  | |
Hurst Pak
CAMM Pro

Location : Crown Point In
Points : 6192
Posts : 393
Reputation : 137
 |  Subject: Re: T/A Hood Venting System- Challenger Install w/ Pic's Subject: Re: T/A Hood Venting System- Challenger Install w/ Pic's  February 27th 2011, 9:50 am February 27th 2011, 9:50 am | |
| Just A note on installing venting system. There are 2 seperate parts , 1- the large triangle 2- the snorkle When installing. do the triangke part first so you has access to all holes for drilling & plastic rivets then re fit the snorkle & tape back in place. drill & attach.  | |
|
  | |
Hurst Pak
CAMM Pro

Location : Crown Point In
Points : 6192
Posts : 393
Reputation : 137
 |  Subject: Re: T/A Hood Venting System- Challenger Install w/ Pic's Subject: Re: T/A Hood Venting System- Challenger Install w/ Pic's  March 1st 2011, 7:45 pm March 1st 2011, 7:45 pm | |
| O.K. I did not like the way the Washer fluid hose crossed over the intake box.  So for about two dollars in parts . I re-directed the hose(will sell the kit on E-bay for $25.00 LOL) Drilled some new holes,Touched up edges with paint. Installed clips over hose & then into holes in hood after paint dried. 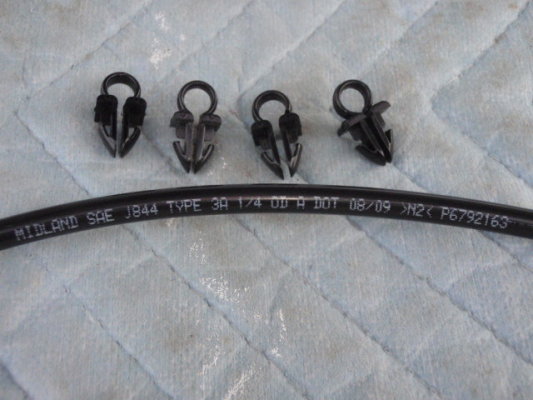   But still was not done. I cut up my Hood insulator to make a template for re installing a new one. 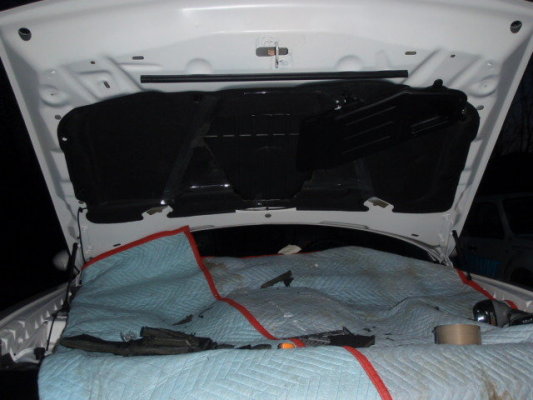 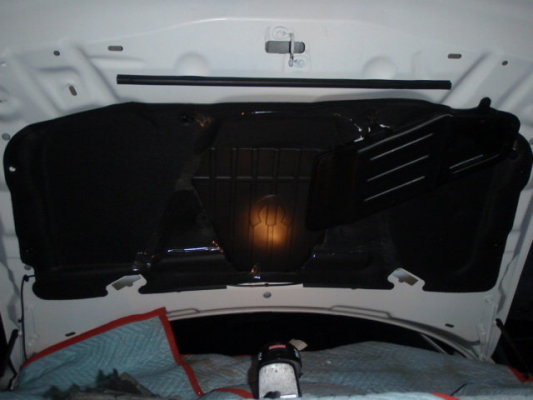 once I have the template perfected. I will buy a new Hood insulator ,then trace & cut it to fit. | |
|
  | |
xegitalian19xx
Founding Member


Location : Chicago
Points : 17981
Posts : 1475
Reputation : 294
 |  Subject: Re: T/A Hood Venting System- Challenger Install w/ Pic's Subject: Re: T/A Hood Venting System- Challenger Install w/ Pic's  March 1st 2011, 7:50 pm March 1st 2011, 7:50 pm | |
| Lookin' good bro!! Nice work!!! | |
|
  | |
Hurst Pak
CAMM Pro

Location : Crown Point In
Points : 6192
Posts : 393
Reputation : 137
 |  Subject: Re: T/A Hood Venting System- Challenger Install w/ Pic's Subject: Re: T/A Hood Venting System- Challenger Install w/ Pic's  March 1st 2011, 8:01 pm March 1st 2011, 8:01 pm | |
| - xegitalian19xx wrote:
- Lookin' good bro!! Nice work!!!
Thanks for the props.  | |
|
  | |
VIKES4093
CAMM Pro

Location : bartlett, il
Points : 6596
Posts : 711
Reputation : 133
 |  Subject: Re: T/A Hood Venting System- Challenger Install w/ Pic's Subject: Re: T/A Hood Venting System- Challenger Install w/ Pic's  March 1st 2011, 9:17 pm March 1st 2011, 9:17 pm | |
| hey finally seen your hood up.its been a mystery for a long time what you had under there | |
|
  | |
Headtripp
Founding Member


Location : McHenry
Points : 19534
Posts : 2605
Reputation : 655
 | |
  | |
Hurst Pak
CAMM Pro

Location : Crown Point In
Points : 6192
Posts : 393
Reputation : 137
 |  Subject: Re: T/A Hood Venting System- Challenger Install w/ Pic's Subject: Re: T/A Hood Venting System- Challenger Install w/ Pic's  March 2nd 2011, 10:23 am March 2nd 2011, 10:23 am | |
| | |
|
  | |
Hurst Pak
CAMM Pro

Location : Crown Point In
Points : 6192
Posts : 393
Reputation : 137
 |  Subject: Re: T/A Hood Venting System- Challenger Install w/ Pic's Subject: Re: T/A Hood Venting System- Challenger Install w/ Pic's  March 2nd 2011, 10:26 am March 2nd 2011, 10:26 am | |
| | |
|
  | |
Sponsored content
 |  Subject: Re: T/A Hood Venting System- Challenger Install w/ Pic's Subject: Re: T/A Hood Venting System- Challenger Install w/ Pic's  | |
| |
|
  | |
| | T/A Hood Venting System- Challenger Install w/ Pic's |  |
|


